Tutorial - Local and Cloud Backup
OneNotify's backup feature supports complete backup of your rule list to local storage or cloud. Rules backed up locally won't be lost even if the app is uninstalled, unless you manually delete them. The cloud backup feature allows you to register and set up your own WebDAV cloud storage to upload rule lists, enabling complete rule list restoration even when switching devices.
Additionally, OneNotify provides automatic backup functionality for VIP users. When you enable the automatic backup option, the software will automatically backup your rule list to the OneNotificationBackups/Auto directory under your backup path when your rule list changes or at other appropriate times. Automatic backup only keeps the latest 30 records to prevent excessive storage usage.
Detailed usage tutorial is as follows.
Setting Up Local Backup Path
OneNotify uses the more secure SAF (Storage Access Framework) storage framework to obtain read and write access permissions for your specified directory. After clicking the local backup path, you will be redirected to the system directory selector where you can choose any directory as OneNotify's file backup root directory. It's recommended to choose directories specifically used for storing backup files, such as 'backup' or 'backups'. Select the directory and click the "Allow access to 'xxxx'" button. The steps are as follows.
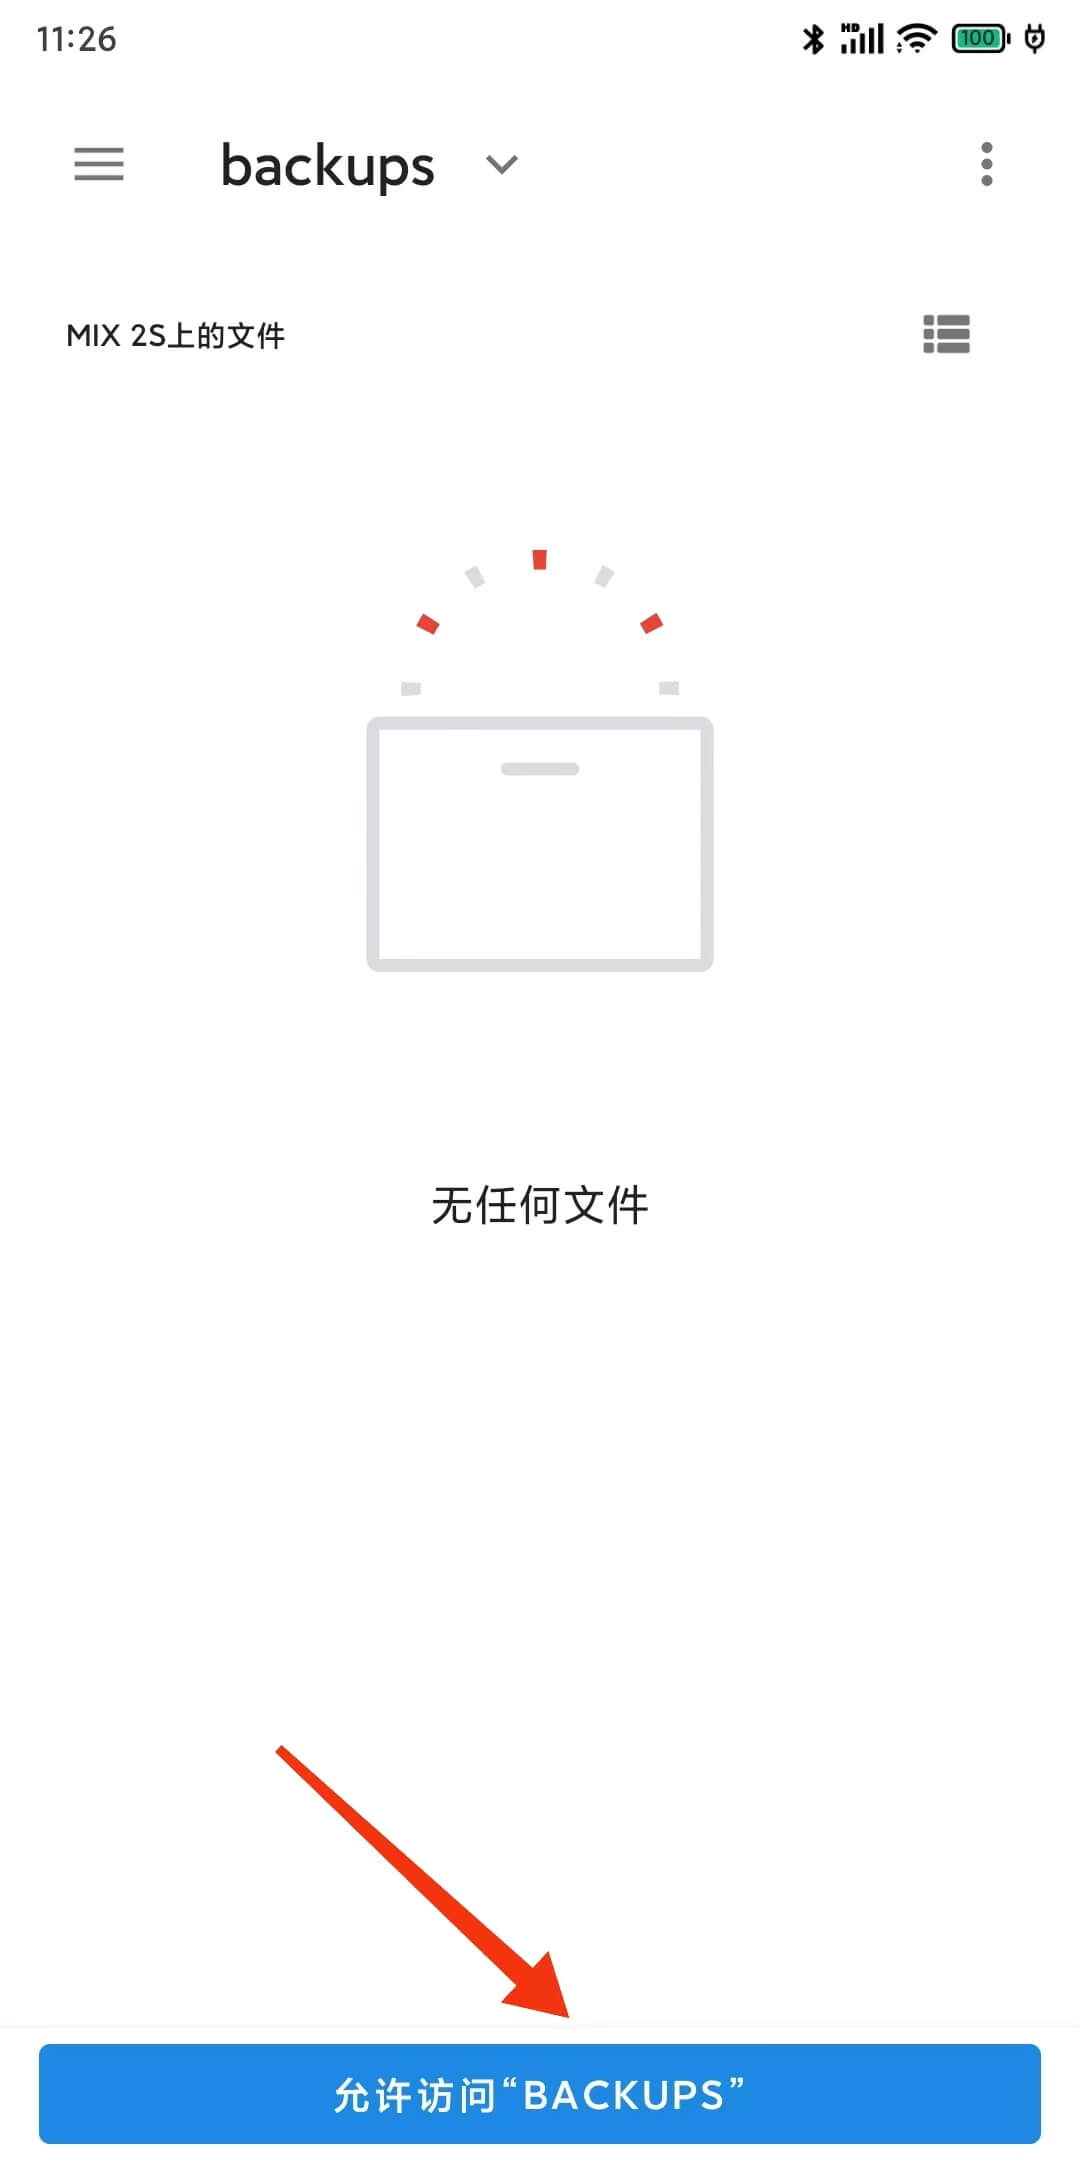 | 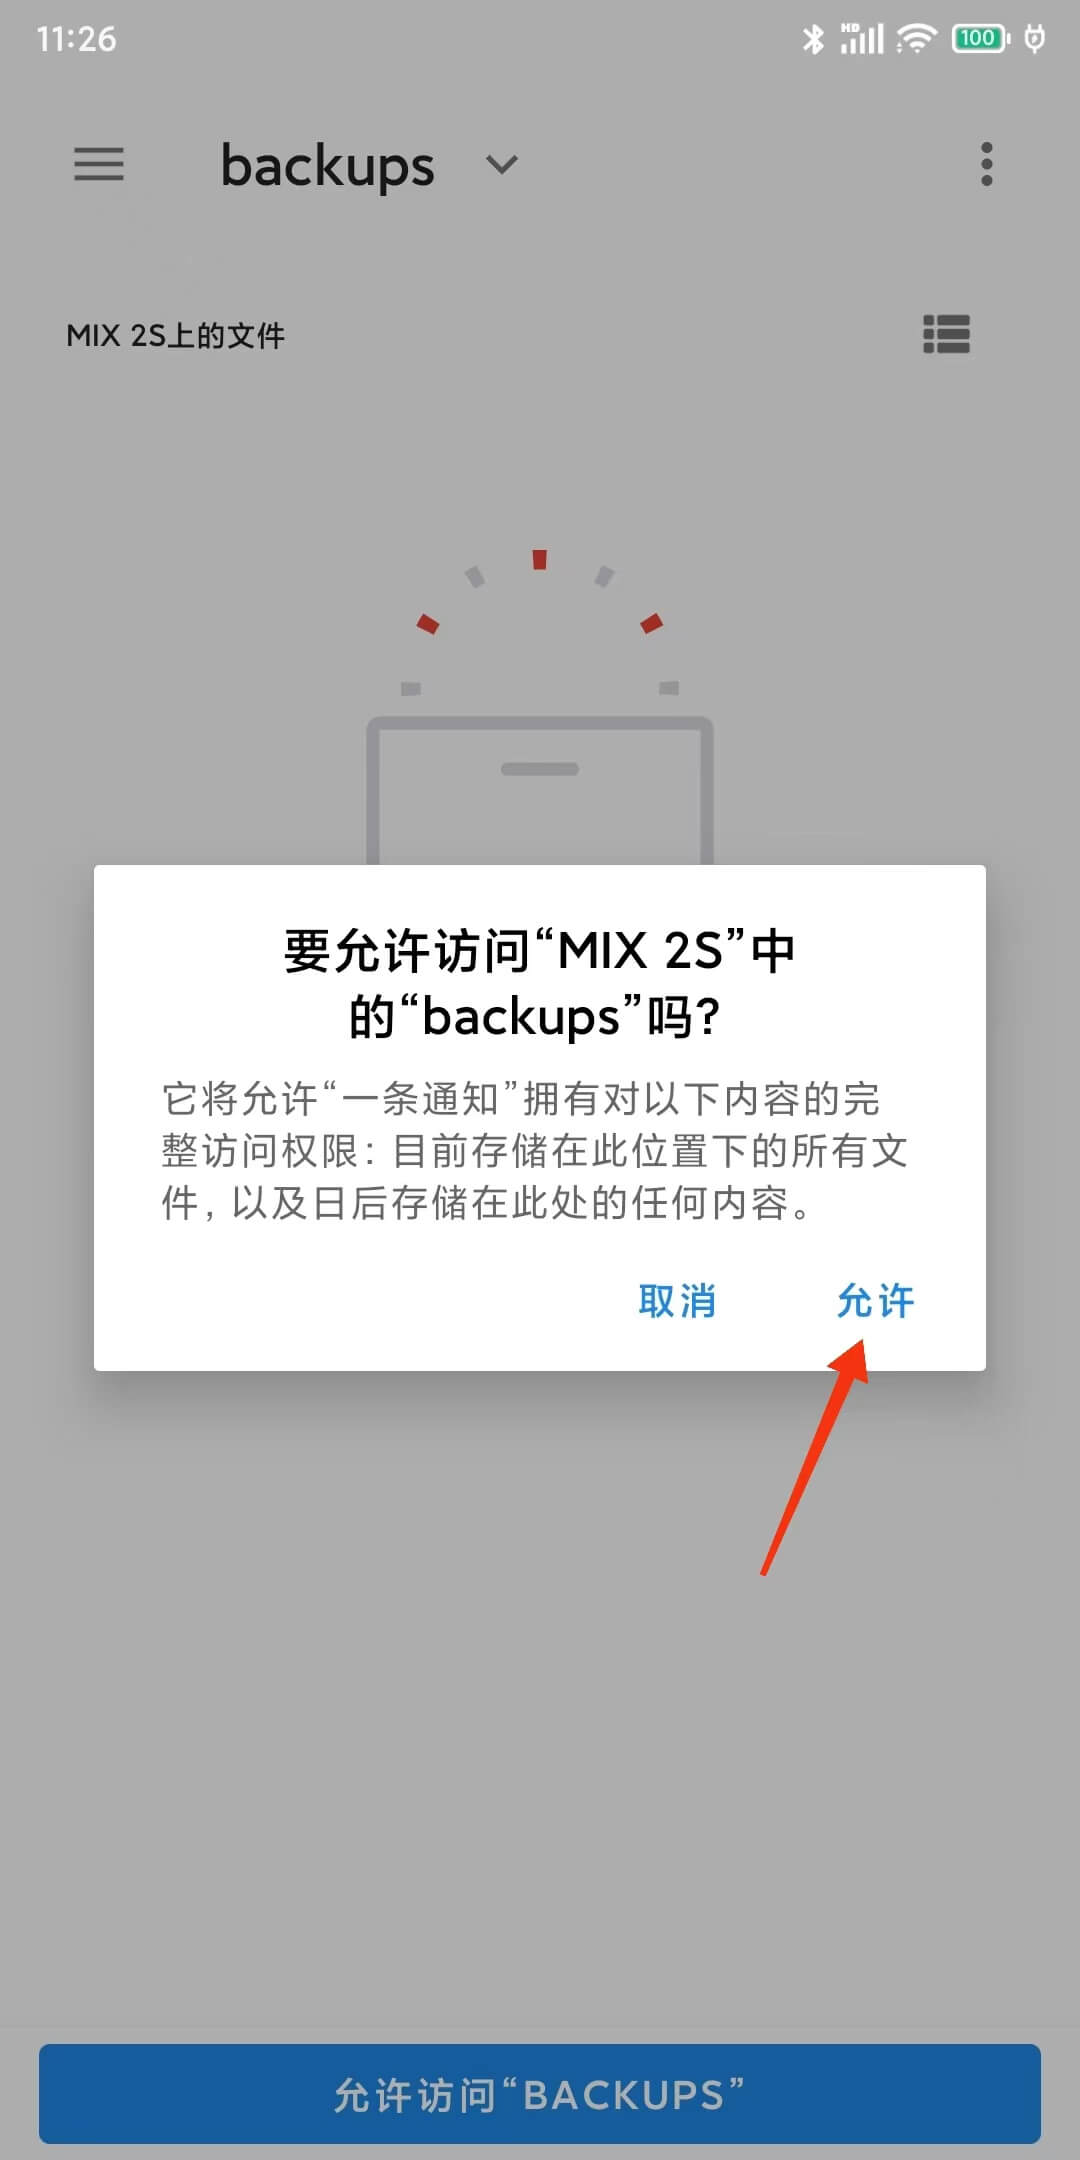 |
As shown in the example above, after clicking allow, OneNotify will create two directories under the backups directory: OneNotificationBackups and Auto. OneNotificationBackups is used to store manual backup files, while the Auto directory is used to store automatic backup files. At this point, you can start using features like backup to local storage and restore from local storage.
Cloud Backup Settings
The cloud backup feature requires you to register your own WebDAV account and obtain the WebDAV URL, username, and password for configuration.
Nutstore cloud storage service is recommended. OneNotify has no business relationship or cooperation with Nutstore; it's recommended simply because Nutstore does an excellent job.
Under OneNotify - Settings - Backup & Restore - Account, you can see three configuration items:
- WebDAV URL
- WebDAV Account
- WebDAV Password
Once you correctly fill in these three items, you can start using OneNotify's cloud backup feature.
Here are two methods to register for Nutstore WebDAV, one is by downloading Nutstore Android version to get the WebDAV information within the app, and another is through the web version of Nutstore (if you don't want to download the Android version):
1. Register WebDAV Account in Nutstore Mobile App
You can download Nutstore Android version from Coolapk or by opening this link:
https://www.coolapk.com/apk/nutstore.android
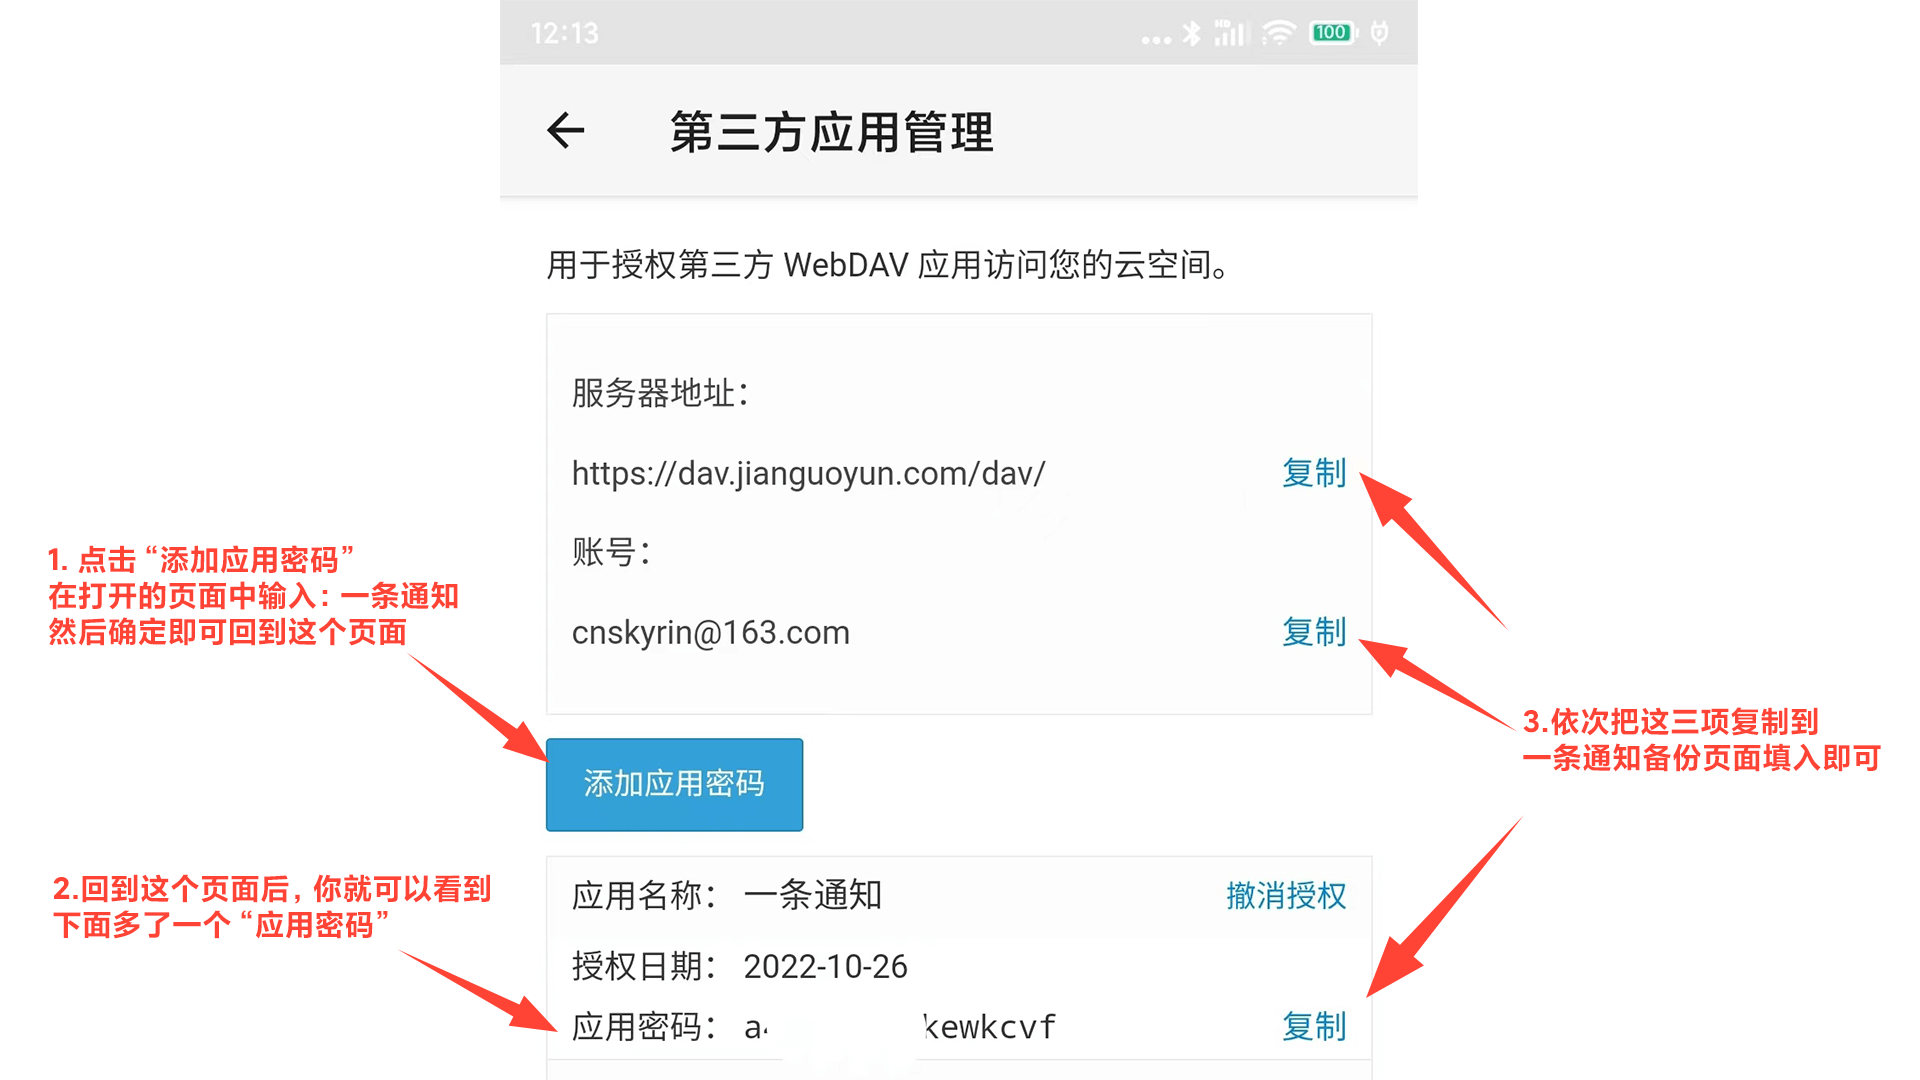
After downloading and installing, register and log in. After logging in, open [Left Sidebar] Menu → Settings → Third-party Application Management, follow the operations in the image:
Red text content in the image:
- Click "Add Application Password", enter: OneNotify on the opened page. Then confirm to return to this page
- Back on this page, you'll see an "Application Password" added below
- Copy these three items to OneNotify's backup page accordingly
2. Register WebDAV Account on Nutstore Web Version
Open this registration link in your computer browser:
https://www.jianguoyun.com/d/signup
After registration, you'll enter the Nutstore web interface and see the following:
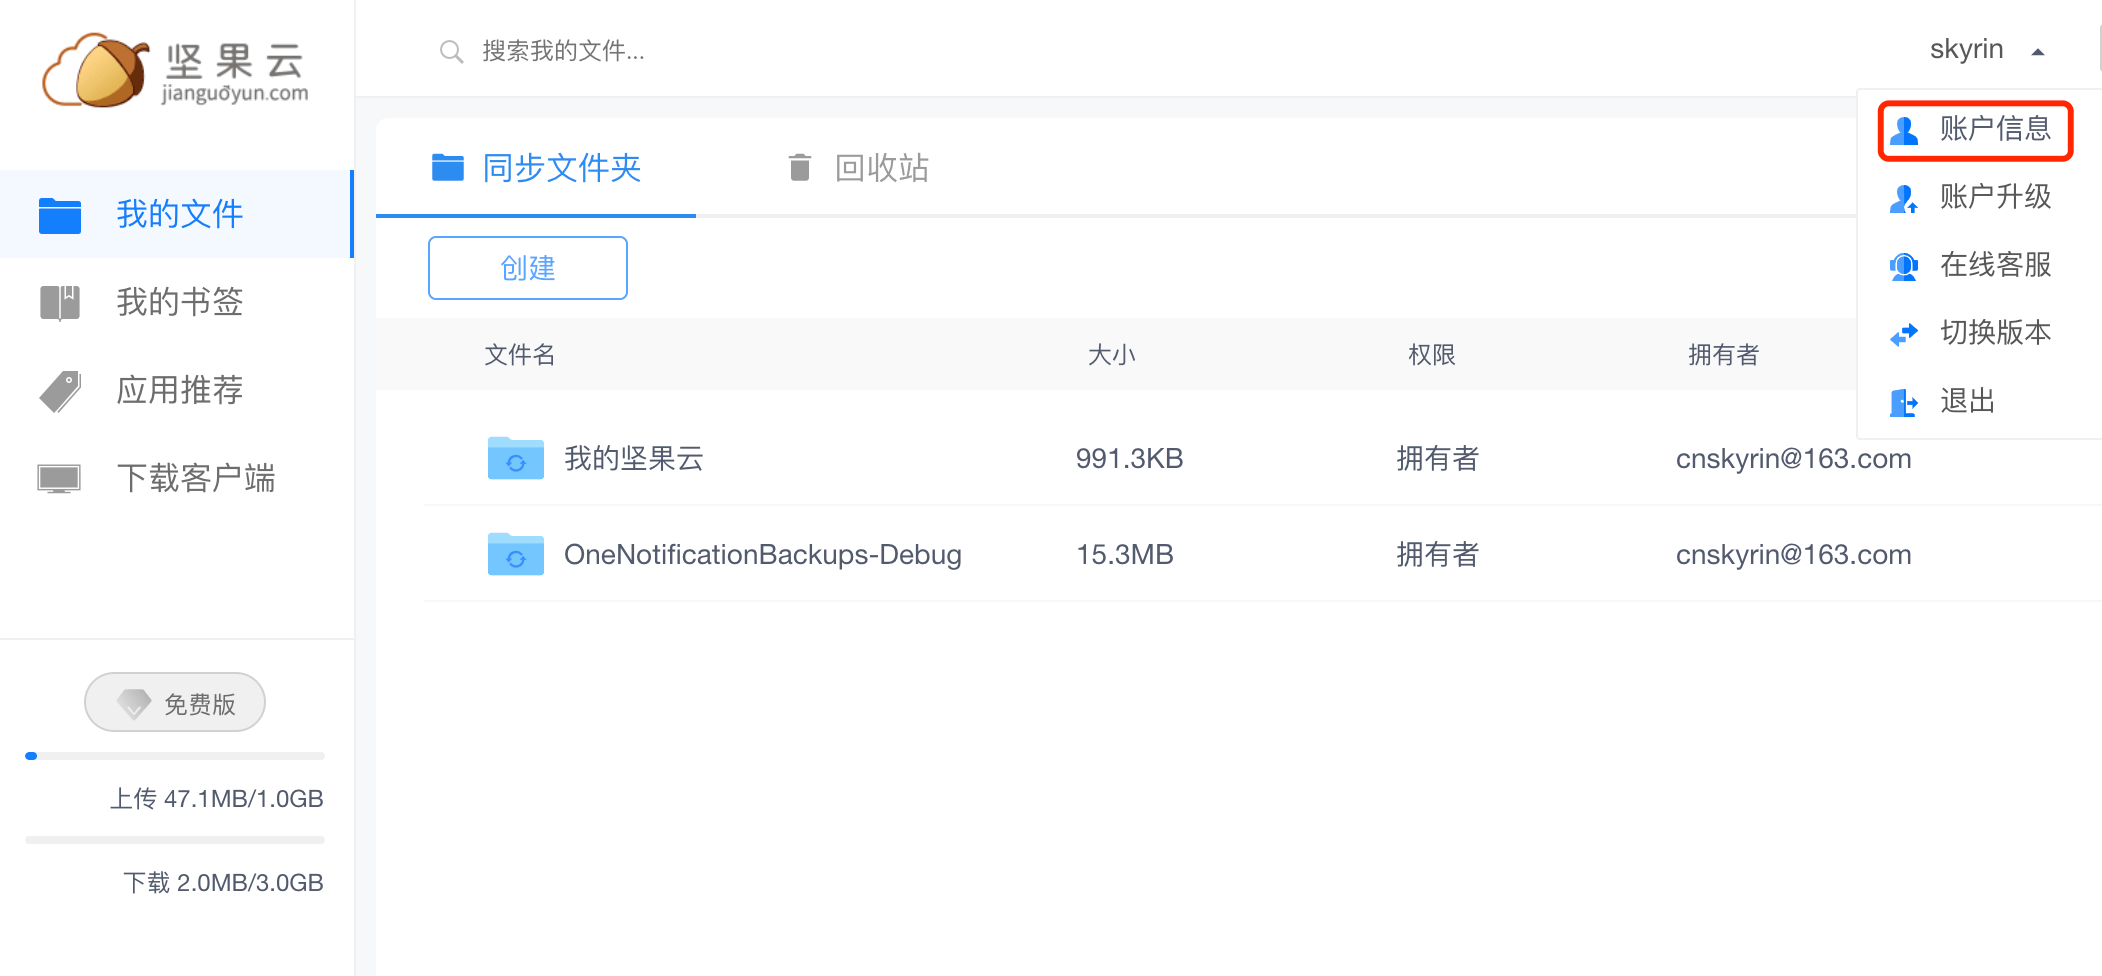
Click your account name in the top right corner and select [Account Information], then select [Security Options].
In Security Options, find Third-party Application Management and select Add Application, enter a name like: OneNotify, then select Generate Password, select complete, and you'll get something like this:
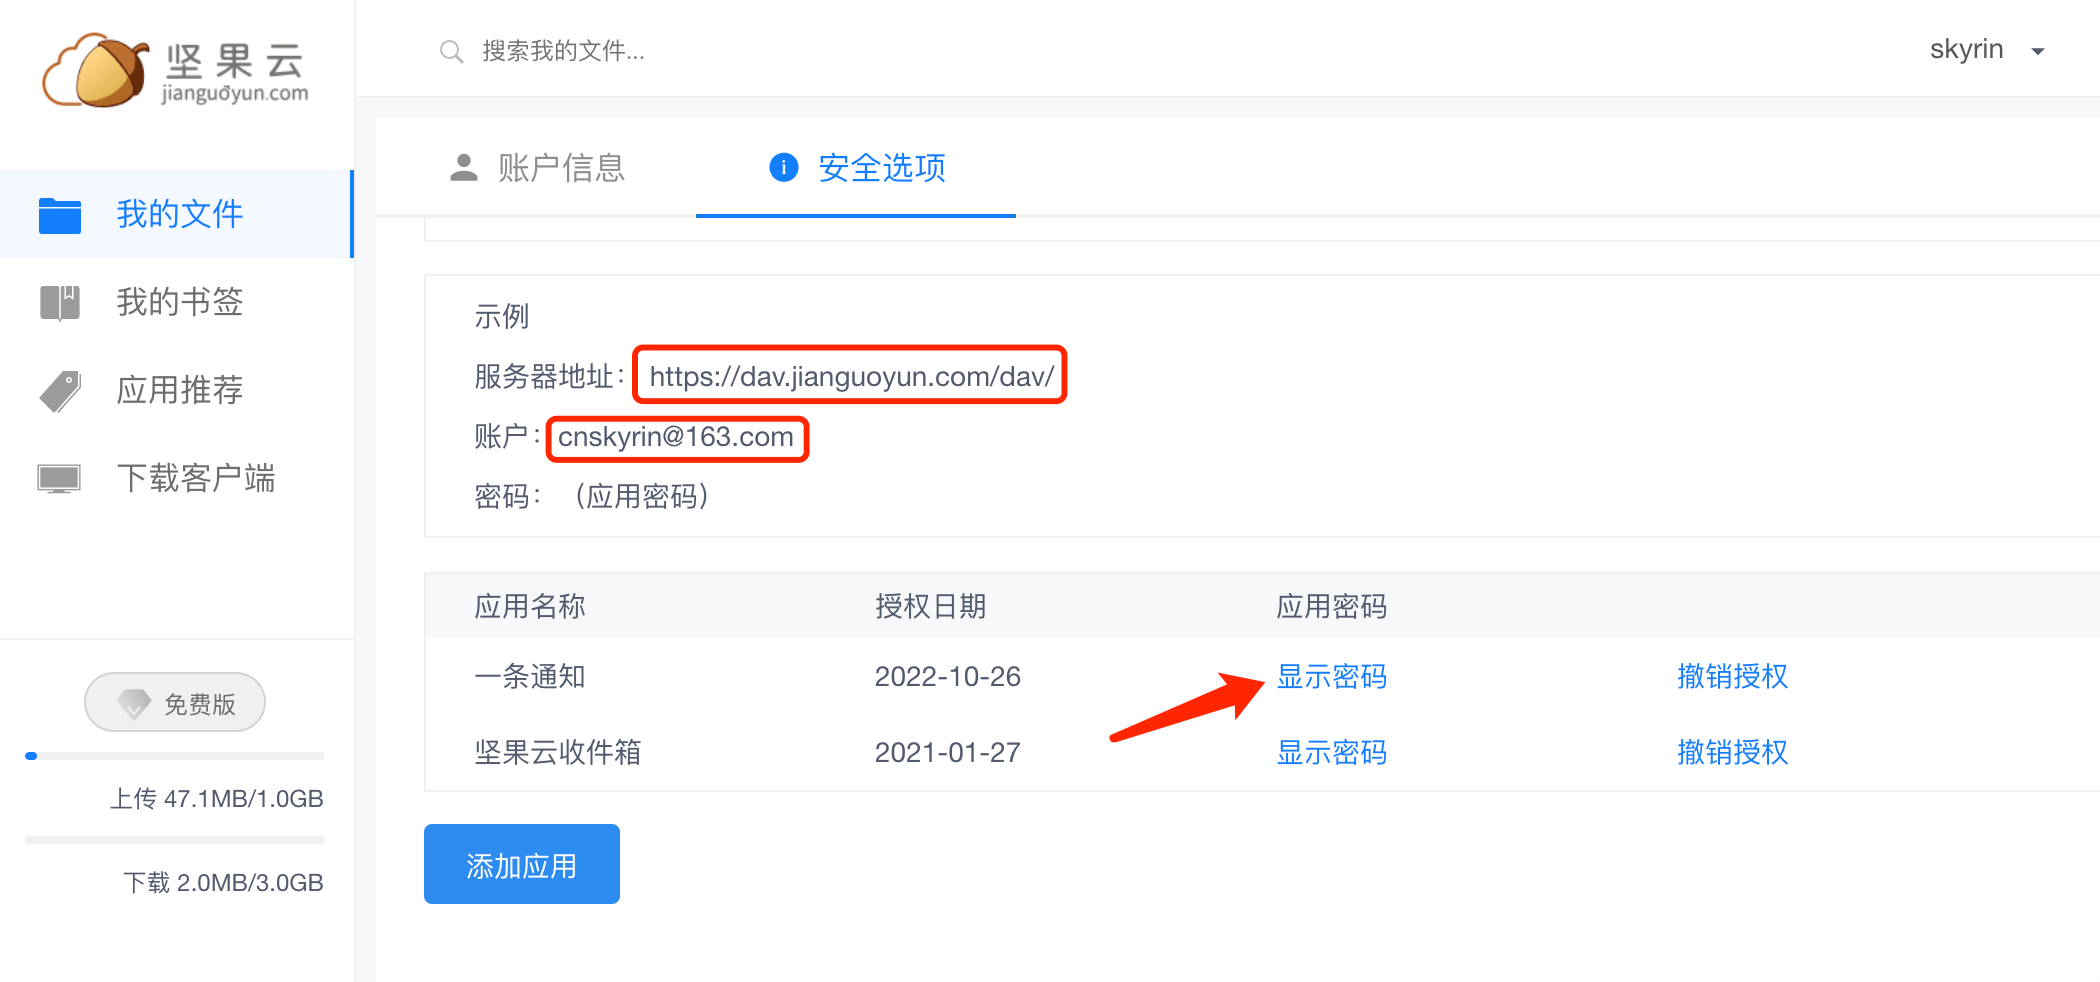
Here, https://dav.jianguoyun.com/dav/ is what you'll enter as the WebDAV URL in OneNotify; the email address after the account is your WebDAV account; and the password shown after clicking display password is your WebDAV password.
Fill these three items into OneNotify accordingly, and you can enjoy worry-free cloud backup.
It's recommended to send the WebDAV password to your phone via WeChat or QQ, then copy it to OneNotify, to avoid manual input errors.